DIY : Tree Wall Decor
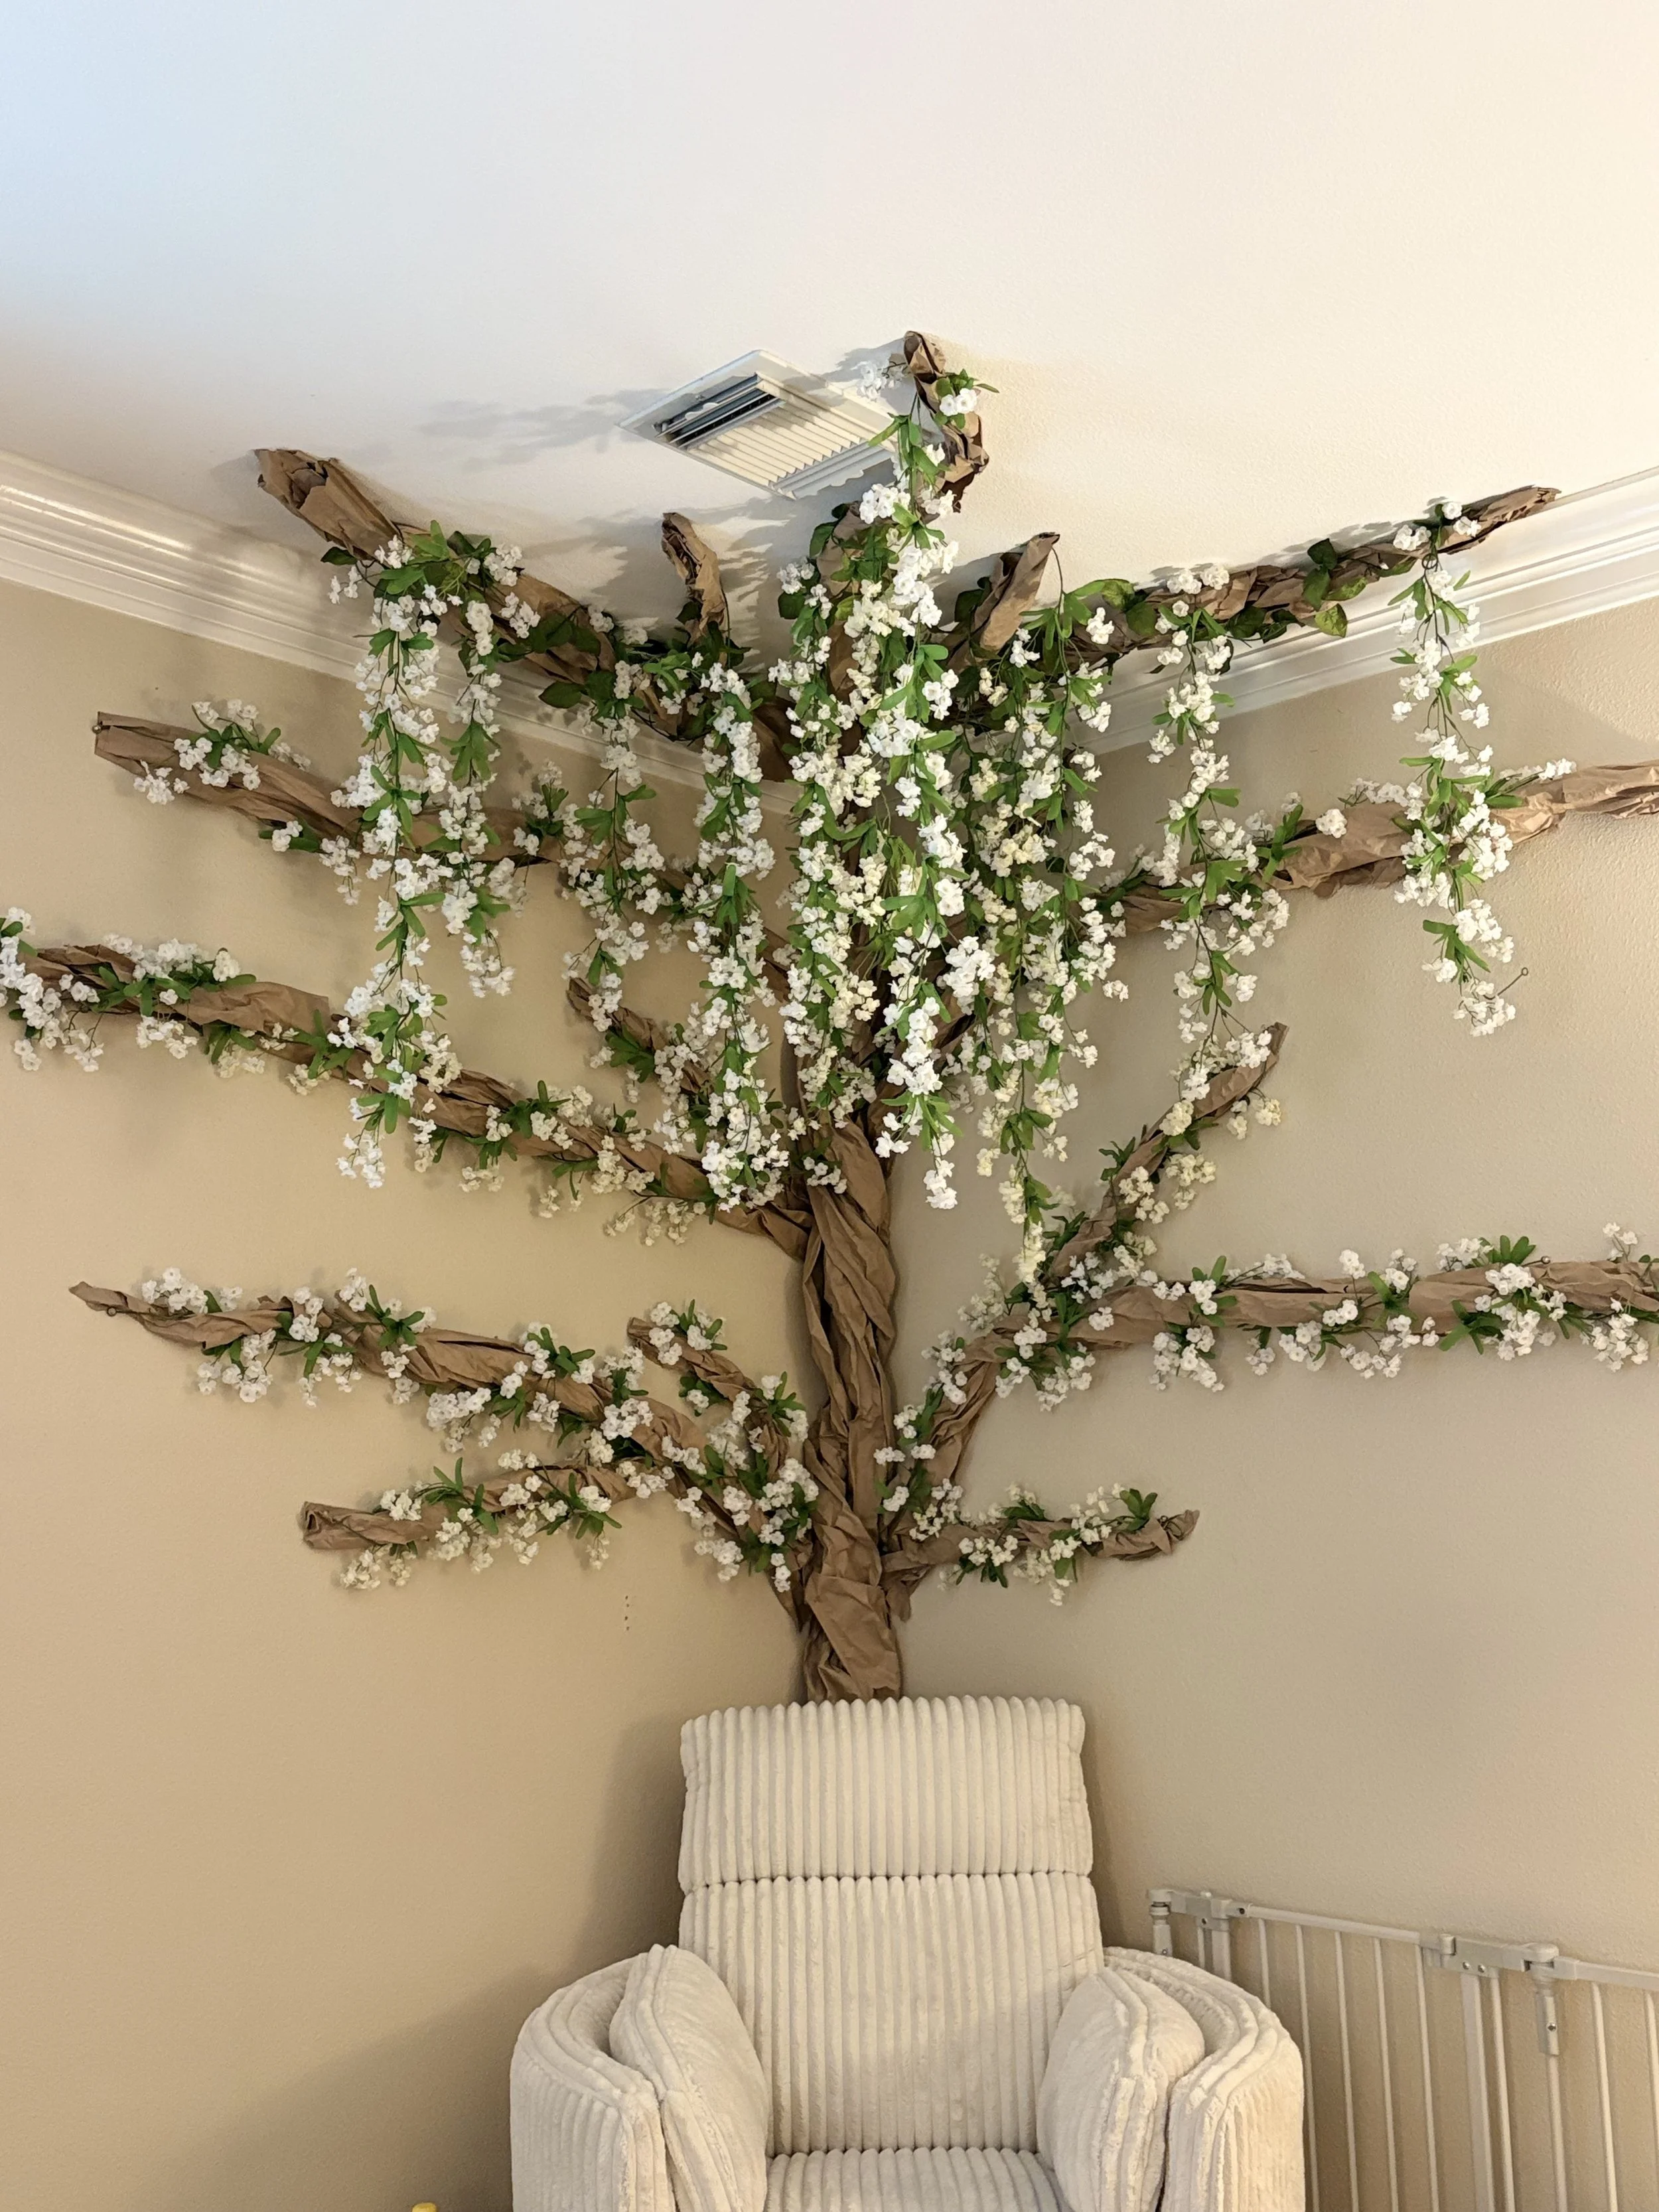
If you want to instantly transform a basic wall into a magical, whimsical escape, you don’t need an expensive contractor or an elaborate custom mural.
This stunning, three-dimensional indoor tree is created using basic packing paper, artificial flowers, and a staple gun.
Whether you are decorating a classroom, daycare center, nursery, or home playroom, this budget-friendly project completely changes the energy of a room. It adds texture, brings the outdoors inside, and creates a cozy anchor point for reading or resting. Here is exactly how to bring this beautiful installation to life in your own space.
🛠️ The Simple Supply List
You don’t need a massive cart full of tools. You can pick up everything you need in a single trip to the craft store:
Several Rolls of Packing Paper: Pick up brown kraft packing paper rolls from your local craft store (like Hobby Lobby) or online.
Faux Flowers and Greenery: Choose whatever seasonal or aesthetic foliage matches your room. Cascading white blossoms, cherry blossoms, or simple green ivy all work beautifully.
A Staple Gun & Heavy-Duty Staples: This is what anchors your tree securely to the drywall.
A Stepladder: To help you reach the ceiling and flare out the upper canopy.
📝 Step-by-Step Instructions
Step 1: Build and Sculpt the Trunk
Start from the bottom and work your way up. Unroll a long section of your packing paper. To give it the texture of real tree bark, bunch up and tightly twist the paper in your hands. Don't worry about being too neat—the more folds, wrinkles, and creases it has, the more realistic it looks! Anchor the base of the trunk to the wall using your staple gun, layering a few twisted pieces together to create a thick, sturdy base.
Step 2: Branch Out
As you move up the wall, start separating the twisted paper rolls into individual branches.
The Technique: Continue twisting the paper tightly, pulling the branches out diagonally and horizontally across the wall.
Securing as You Go: Place staples every few inches along the paper to hold the shape against the drywall. Twist smaller, thinner pieces of paper to create the offshoot twigs near the top and outer edges.
Step 3: Weave and Feed the Florals
Once your paper skeleton is completely stapled and secure, it's time for the magic step. Take your artificial flower stems and greenery and feed them directly through the staples holding the paper. Slide the stems behind the paper gaps or weave them loosely over and under the branches. This hides your hardware completely and makes the blossoms look like they are naturally growing right out of the wood.
🏡 Real-World Ways to Use Your Magical Tree
This exact tree is incredibly versatile and transitions beautifully as your children or business needs grow:
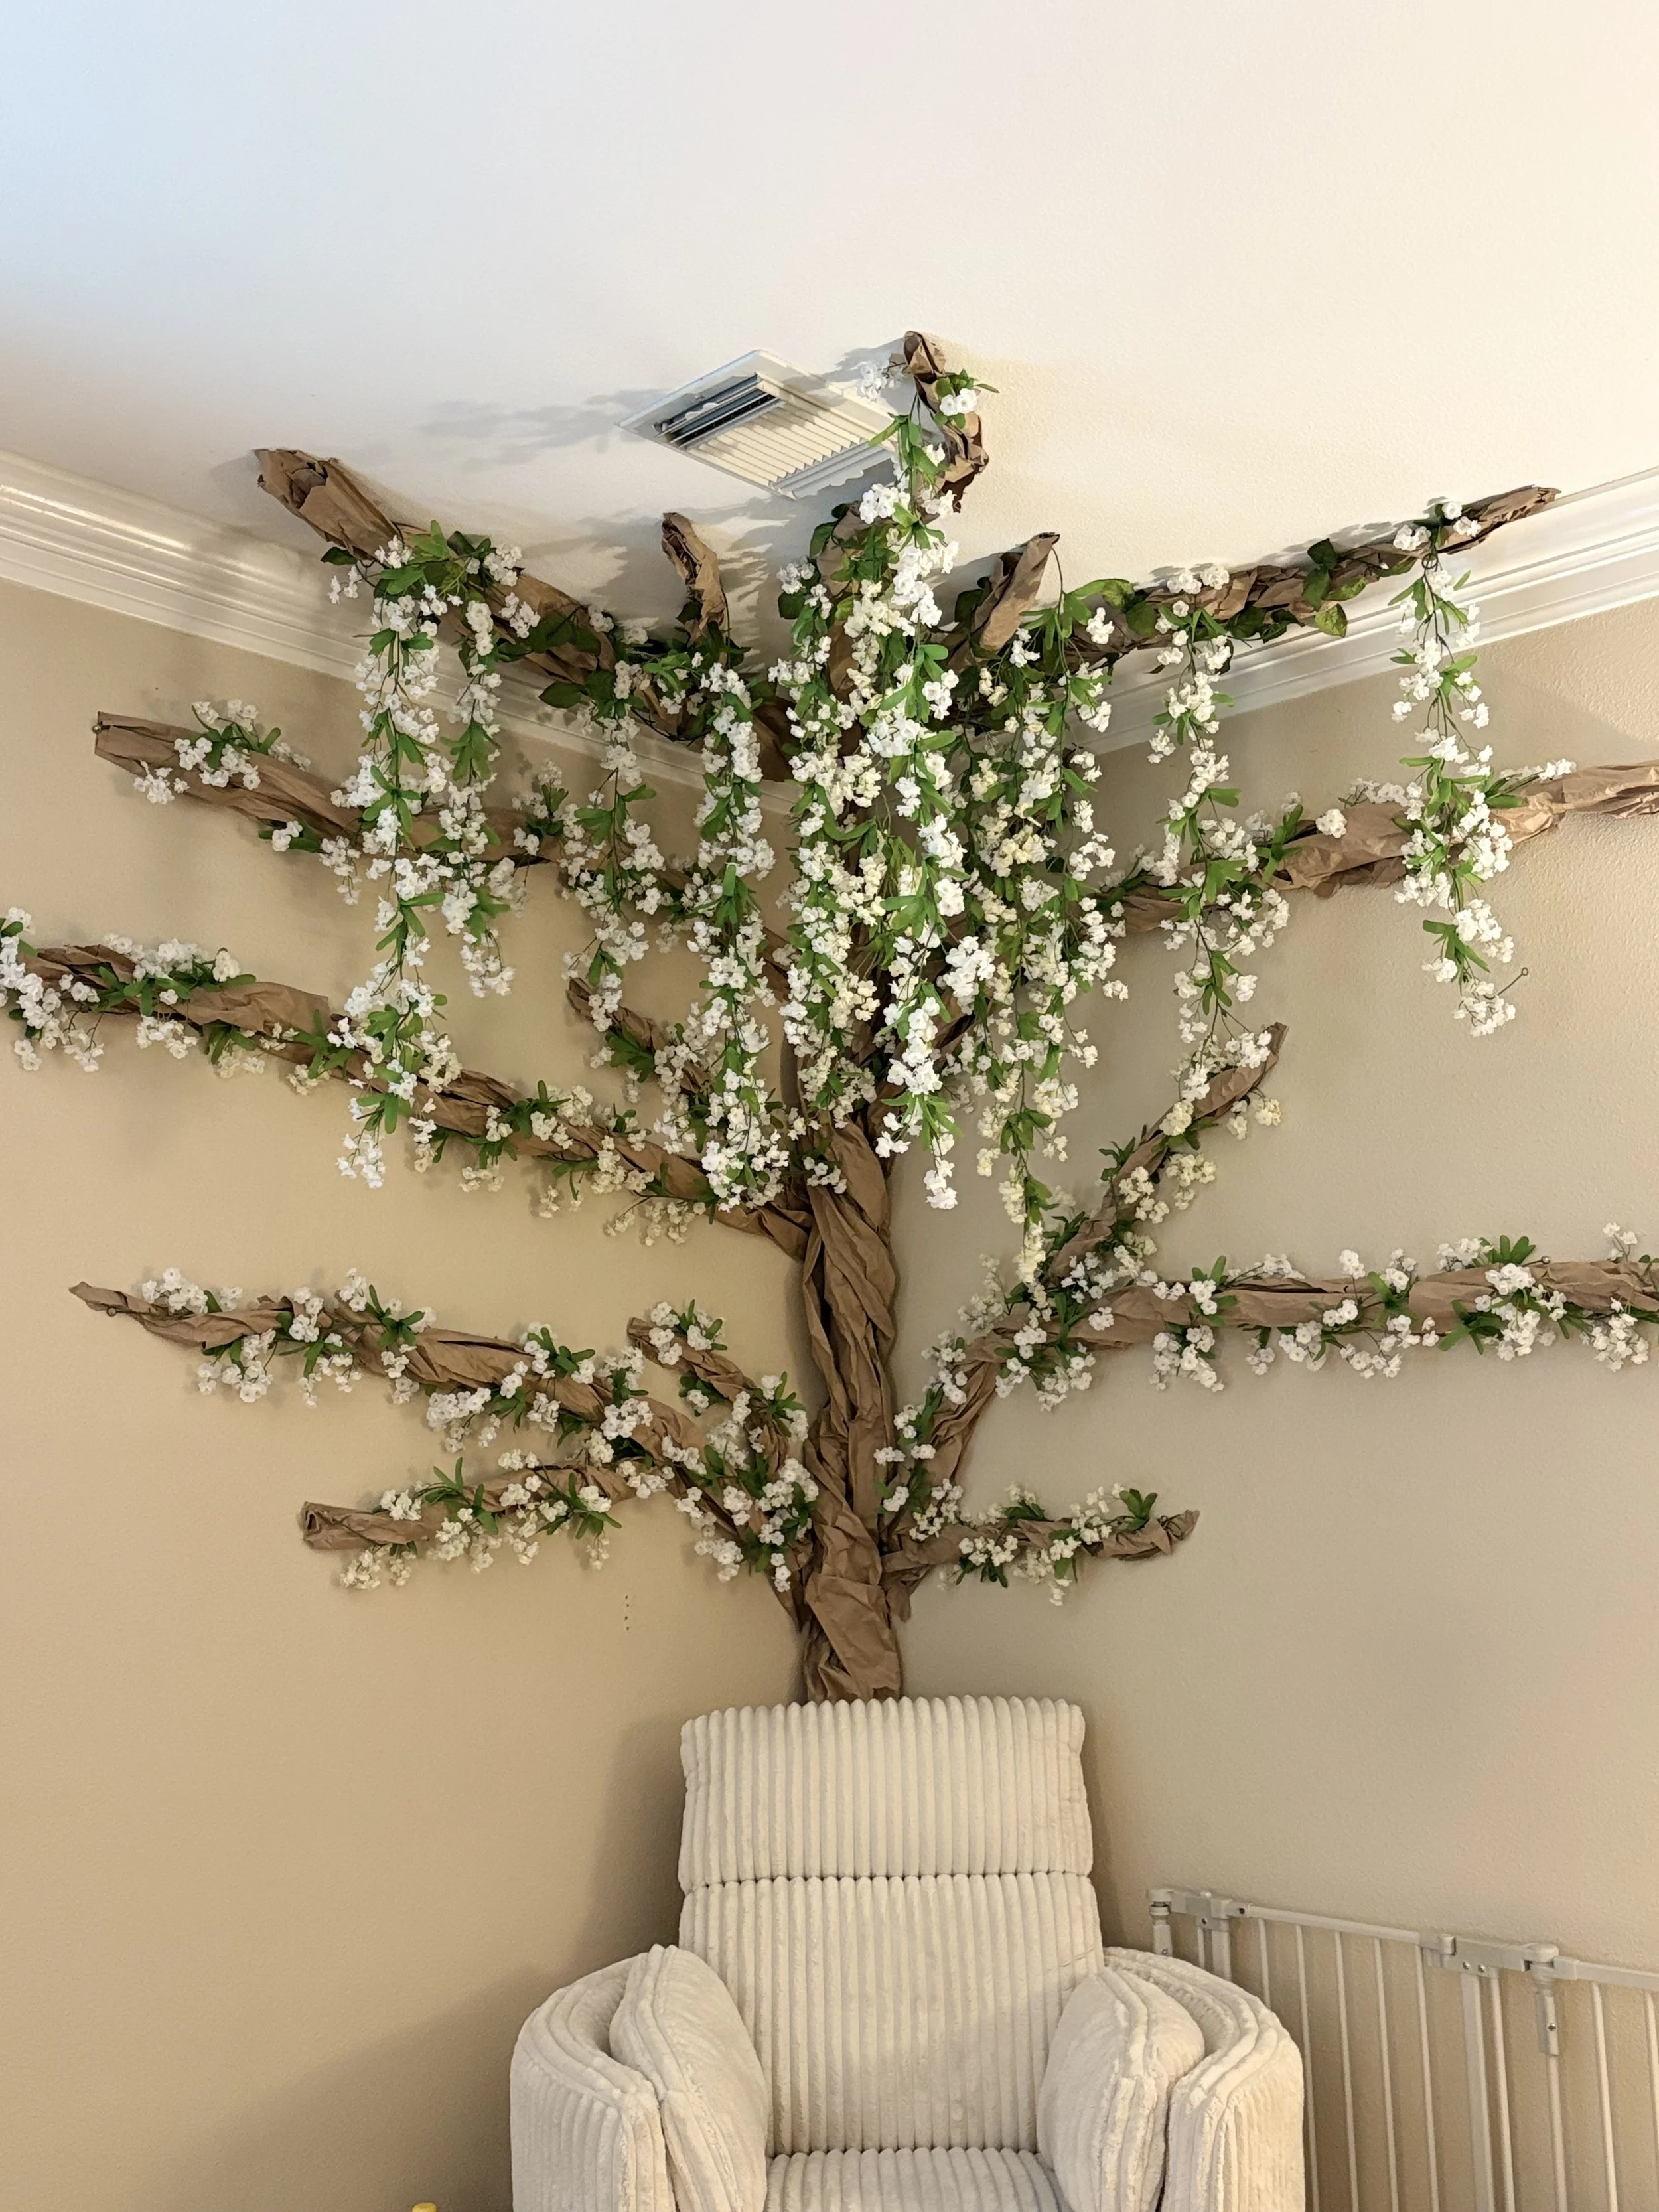
The Infant Section (Original Design): Place a comfortable glider or rocking chair directly underneath the tree. Sitting beneath the canopy of flowers creates a peaceful, calming environment for feeding babies their bottles and/or placing their crib beneath for resting.
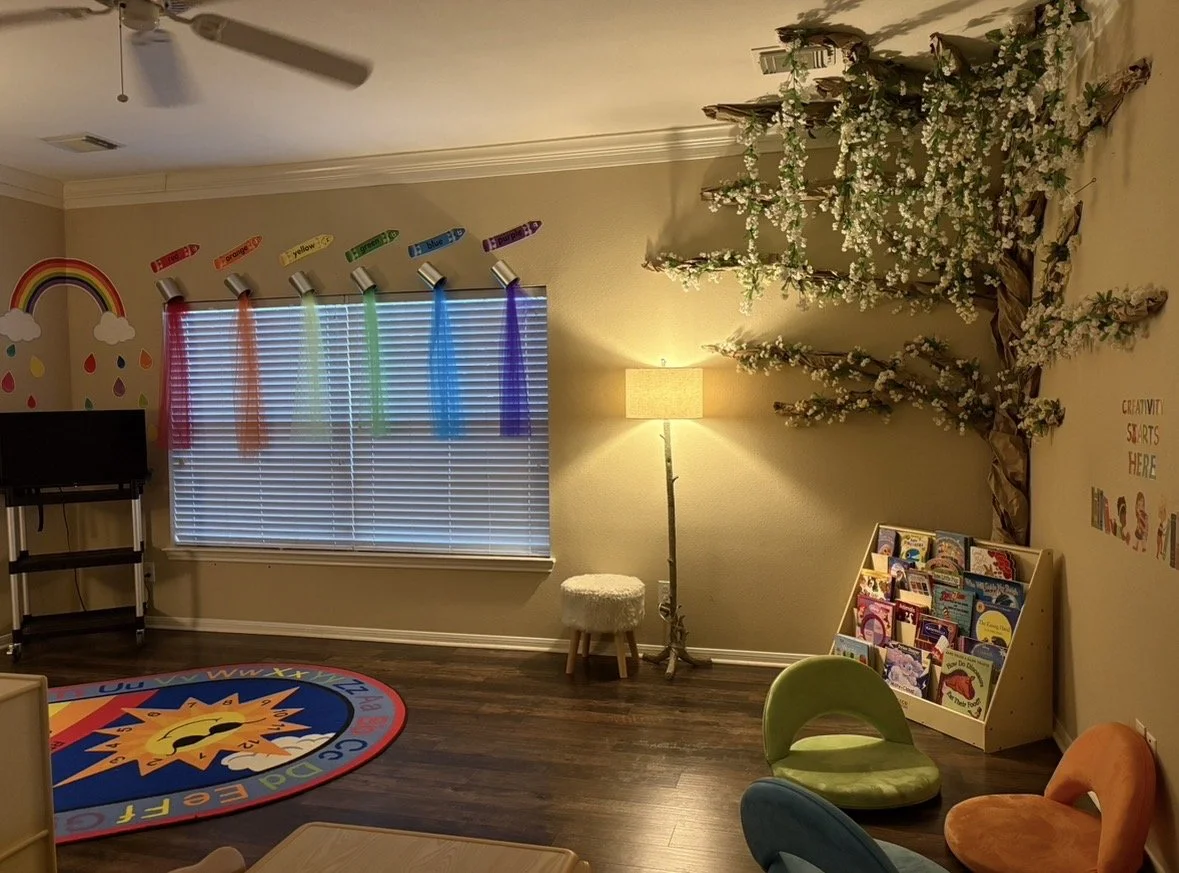
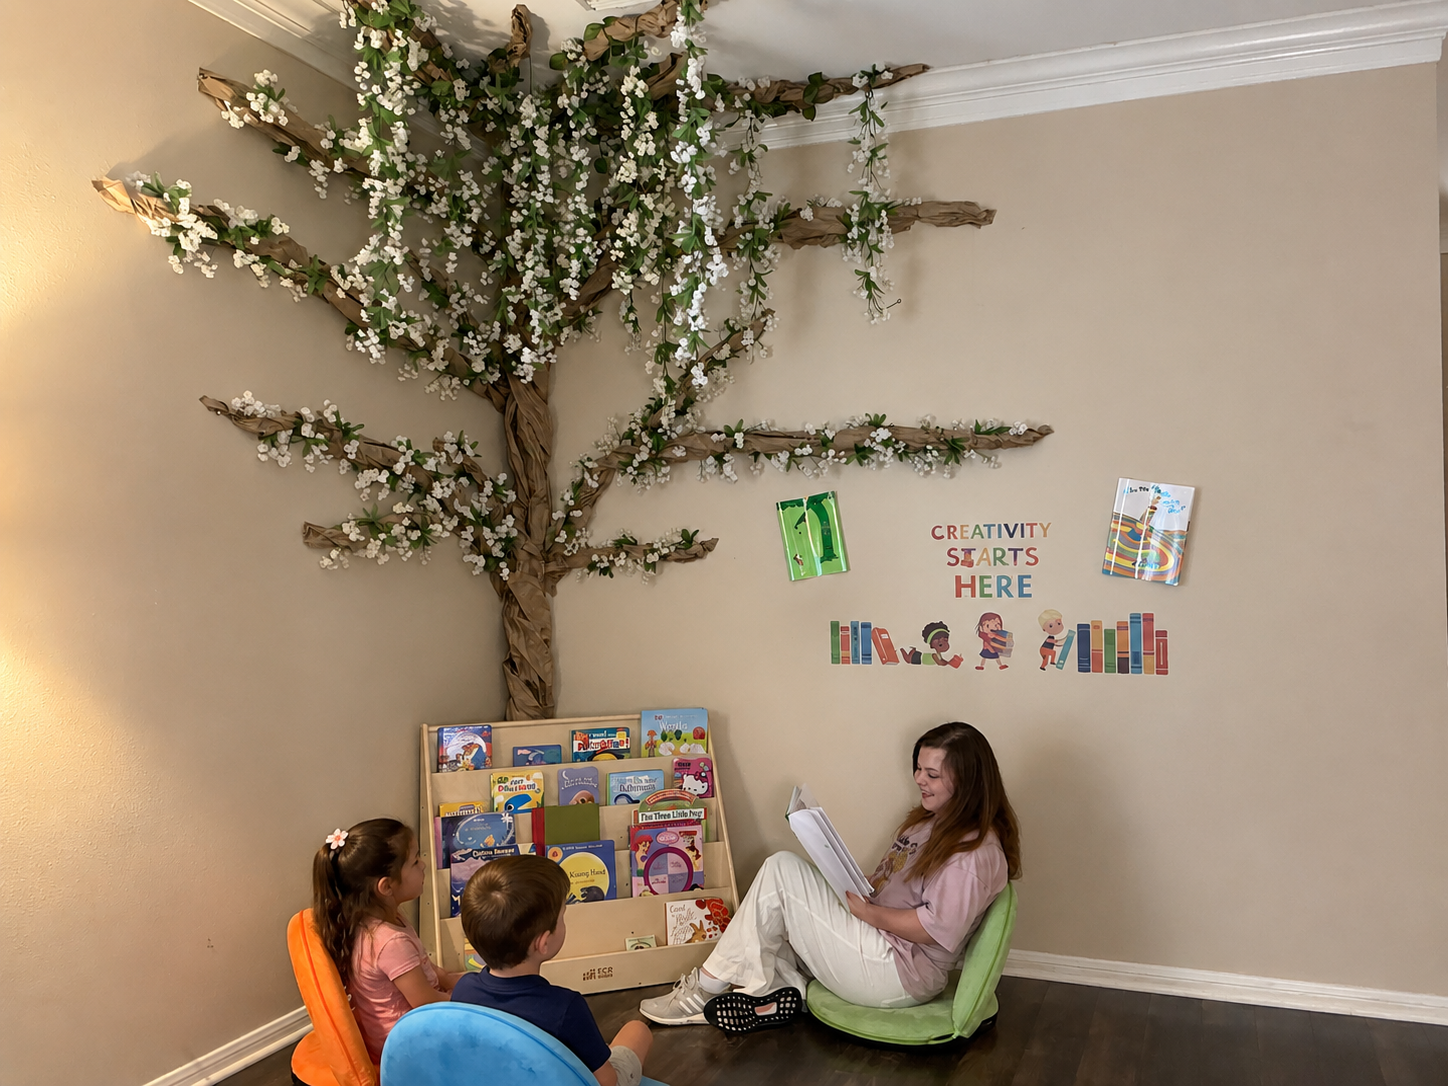
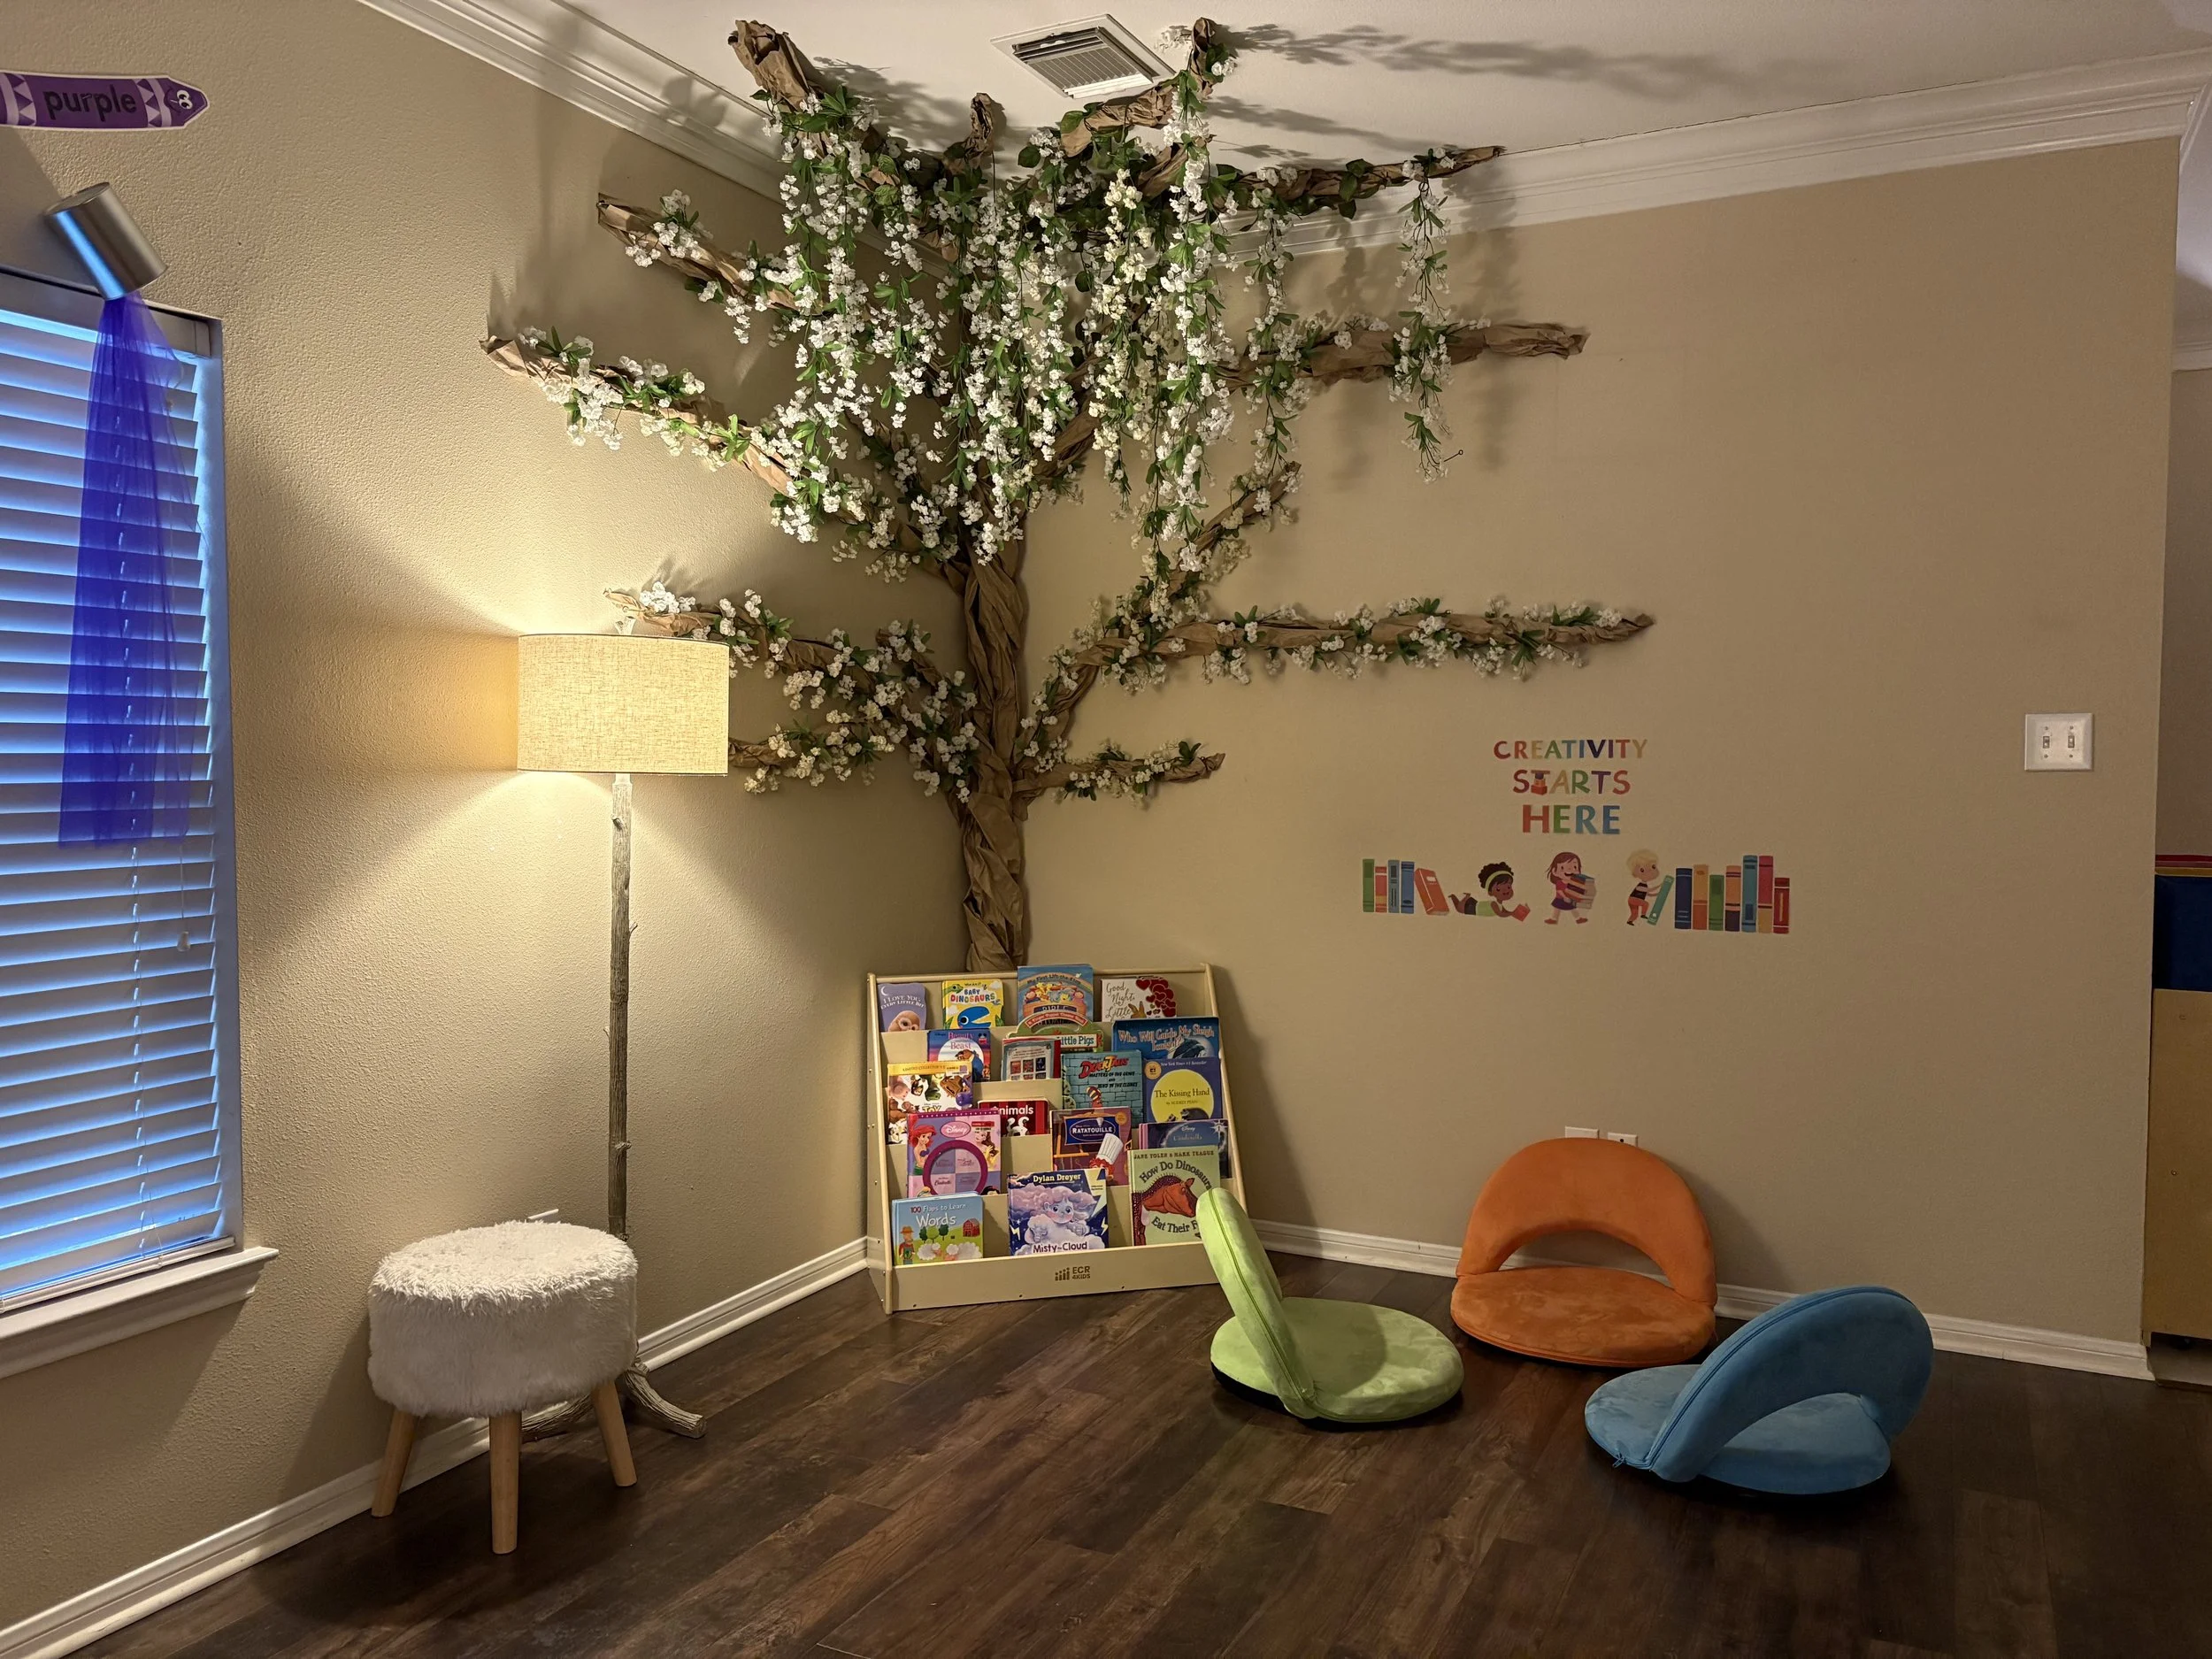
The Cozy Reading Library (Current Design): Swap the rocker for a plush rug, some oversized floor cushions, and a low bookshelf. The sweeping branches instantly define a dedicated, cozy reading nook that invites kids to grab a book and stay a while.
📸 Inspiration Gallery
See below for how this tree completely transforms a space, from the soothing feeding area setup to its current home as a vibrant children's reading library!